
⏱️ 5 Minutes to Master MIDI Toolbox Editor: How to Efficiently Quantize Your Notes
Have you ever recorded a melody that sounded great in your head, but when you played it back, the rhythm felt... "off"? Or maybe you drew notes with your mouse, but they aren't lining up perfectly with the beat?
In the world of digital music, this is called a Timing Error. And the solution is a powerful tool called Quantization.
In this guide, we'll show you how to use the Quantize (Q) feature in the MIDI Toolbox Editor to professionally tighten your performance in seconds.
🤔 What is Quantization?
Imagine a piece of graph paper. If you draw a dot that falls slightly between the lines, "Quantizing" is the act of automatically moving that dot to the nearest grid line.
In music, it moves your notes to the nearest musical beat (like a 1/8 note or 1/16 note), ensuring your rhythm is mathematically precise.
🛠️ Step-by-Step: How to Quantize in MIDI Toolbox
Correcting your rhythm in MIDI Toolbox is powerful yet simple. Here is the workflow:
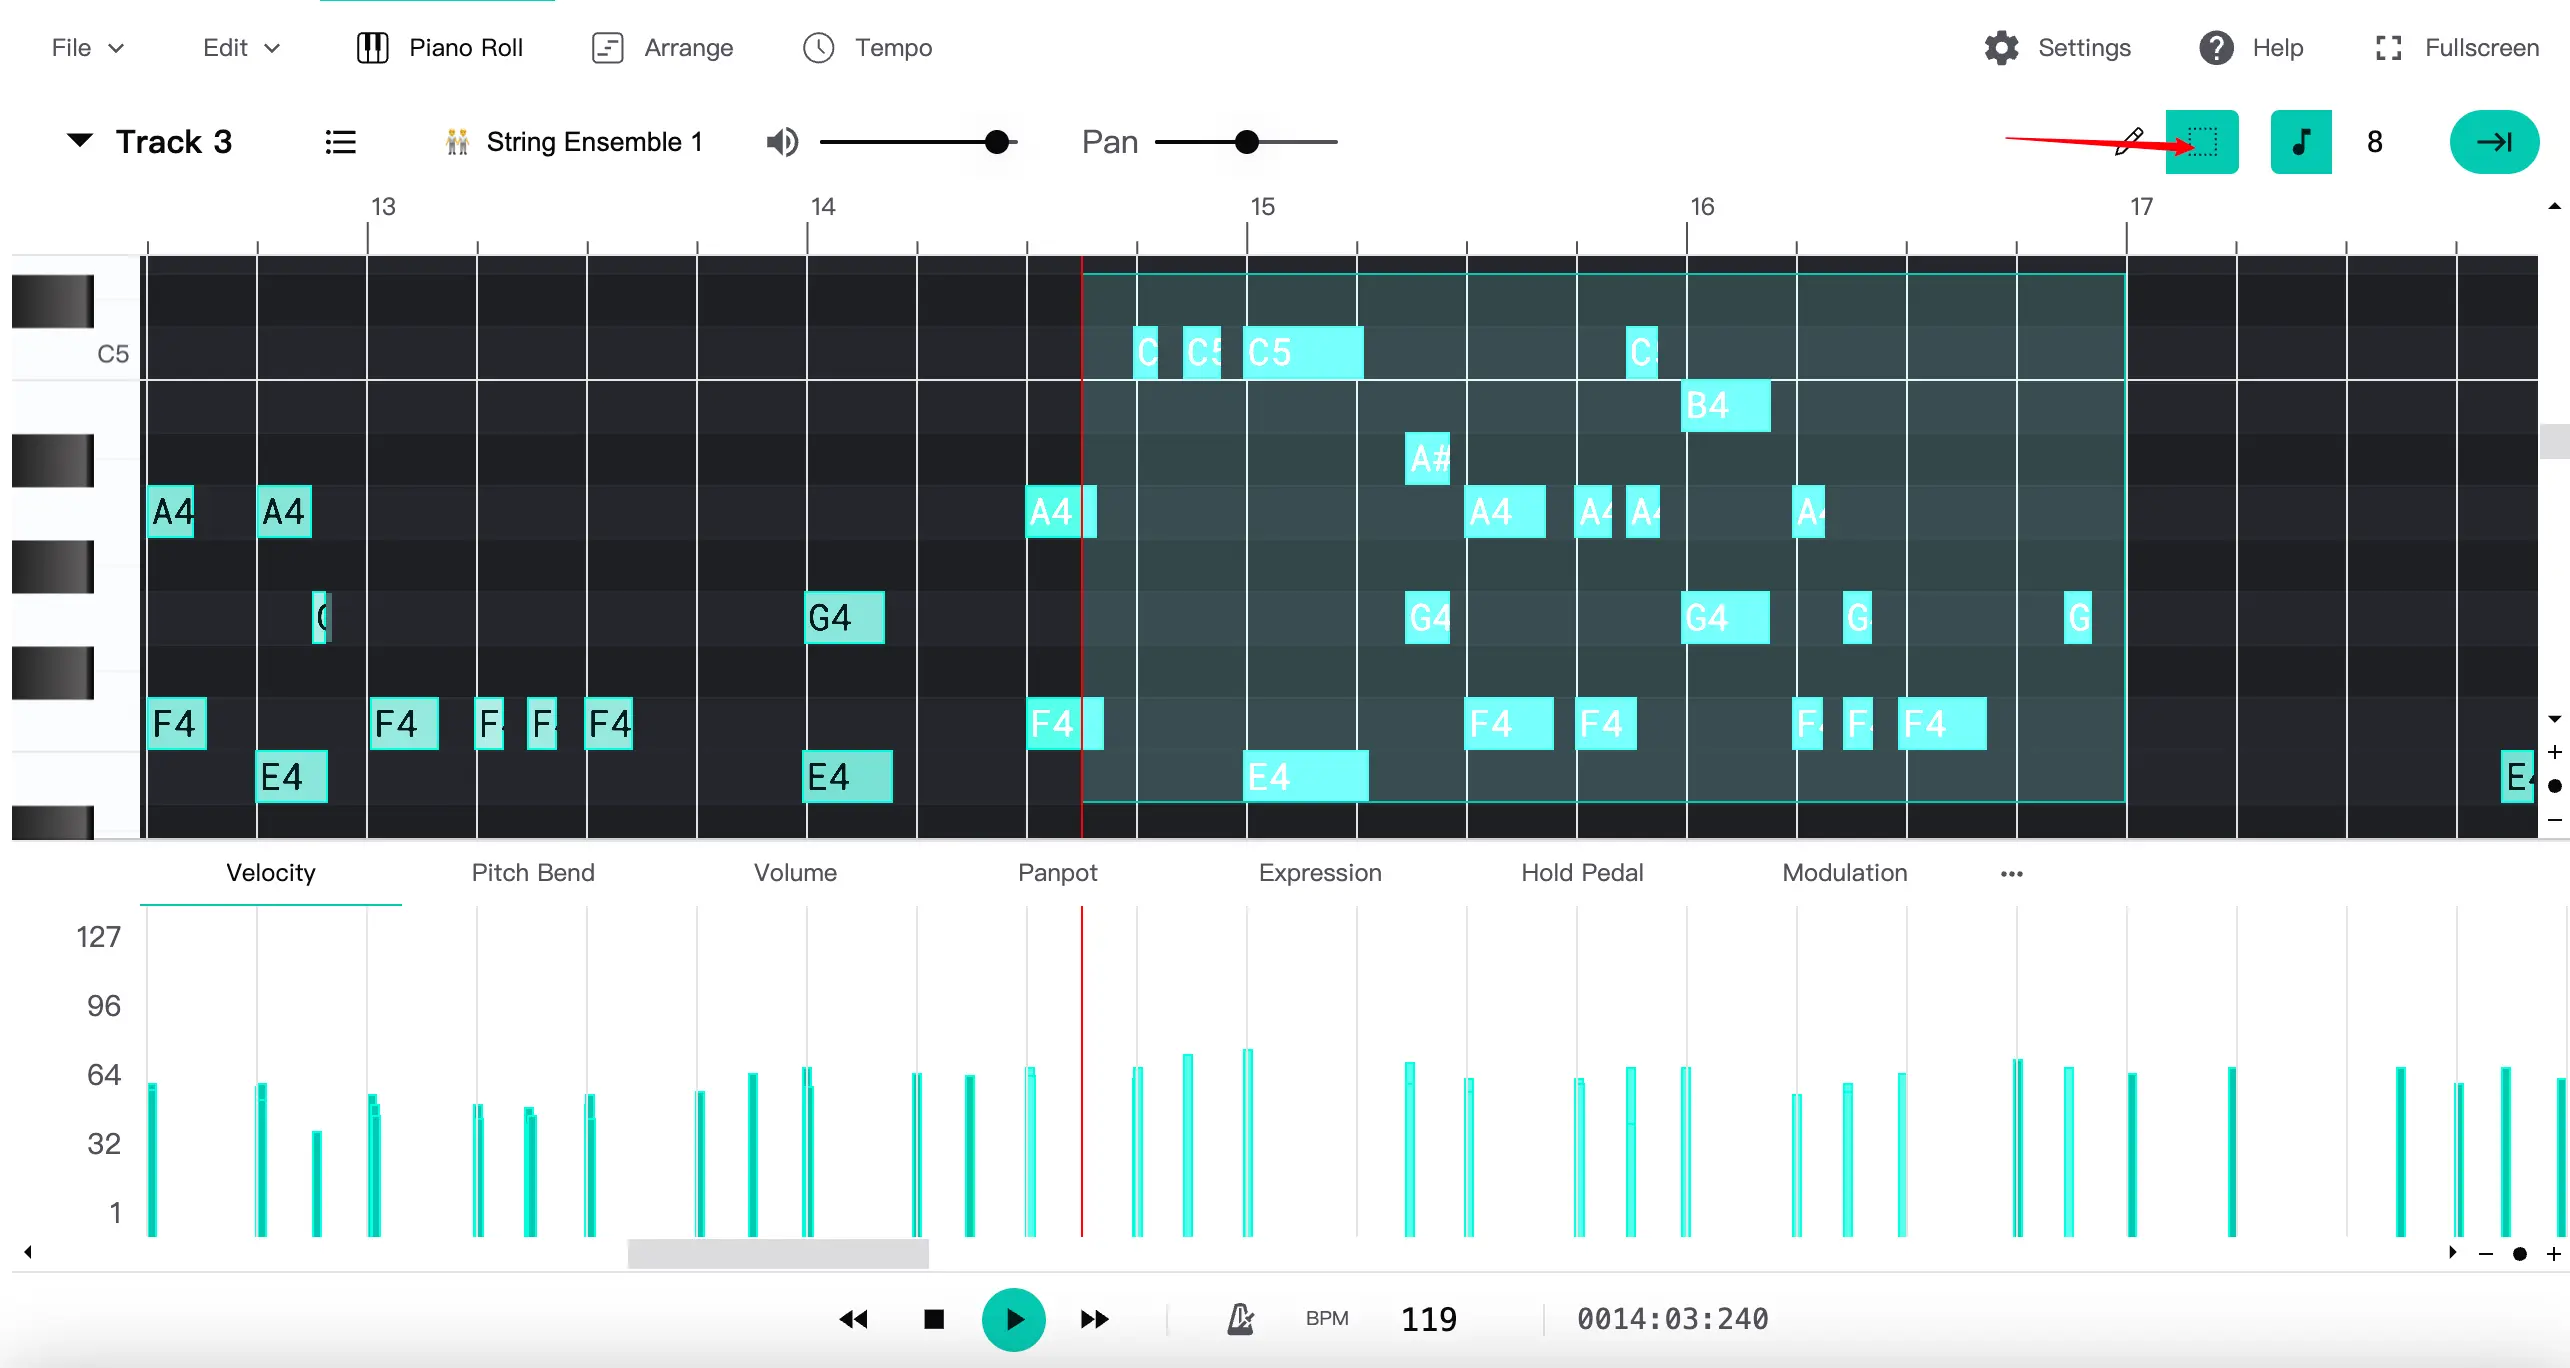
Step 1: Select Your Notes (Crucial!) 🖱️
The Quantize function only affects selected notes. This is a safety feature to prevent you from accidentally messing up the whole song.
- Select a Region: Click and drag a box around the notes you want to fix.
- Select Specific Notes: Hold
Shift(orCmd/Ctrl) and click individual notes. - Select All: If you want to fix the entire track, press
Cmd + A(Mac) orCtrl + A(Windows).
Selected notes will appear highlighted. If you don't select anything, the Quantize button won't know what to fix!
Step 2: Trigger the Quantize Function ⚡
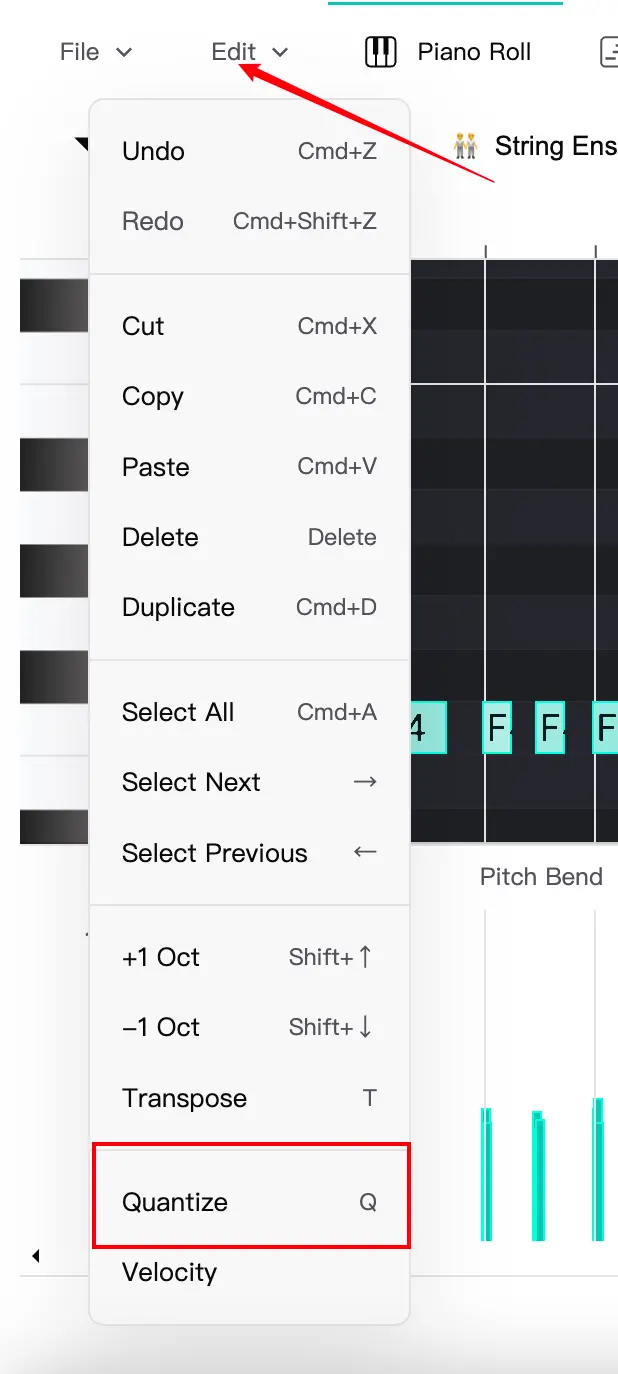
Once your notes are selected, you can open the Quantize options in two ways:
- Keyboard Shortcut: Simply press
Qon your keyboard (Fastest method). - Menu: Click Edit in the top menu bar, then select Quantize.
Step 3: Choose Your Settings (Grid, Triplets & Strength) 🎛️
This is where the magic happens. When you trigger the function, you can configure exactly how the notes move:
- Grid Size (1/4 - 1/32): Choose the rhythmic value to snap to.
- Use 1/8 for standard pop/rock rhythms.
- Use 1/16 for faster melodies or intricate hi-hats.
- Triplets: Enable this if your song has a "swing" feel or is in 3/4 time (like a waltz).
- Strength (The "Human" Slider): You don't always have to quantize to 100%.
- 100% Strength: Notes snap perfectly to the grid (Robotic perfection).
- 50% Strength: Notes move halfway towards the grid. This fixes big mistakes but keeps the natural "human feel" of your performance.

Step 4: Apply and Undo (If Needed) ↩️
Click confirm to apply the changes. You will see your selected notes instantly jump to their new positions.
Did it move the notes to the wrong place? Don't panic! MIDI Toolbox supports full Undo.
- Press
Cmd + Z(Mac) orCtrl + Z(Windows). - Or click Edit > Undo in the menu.
You can experiment fearlessly knowing you can always go back.
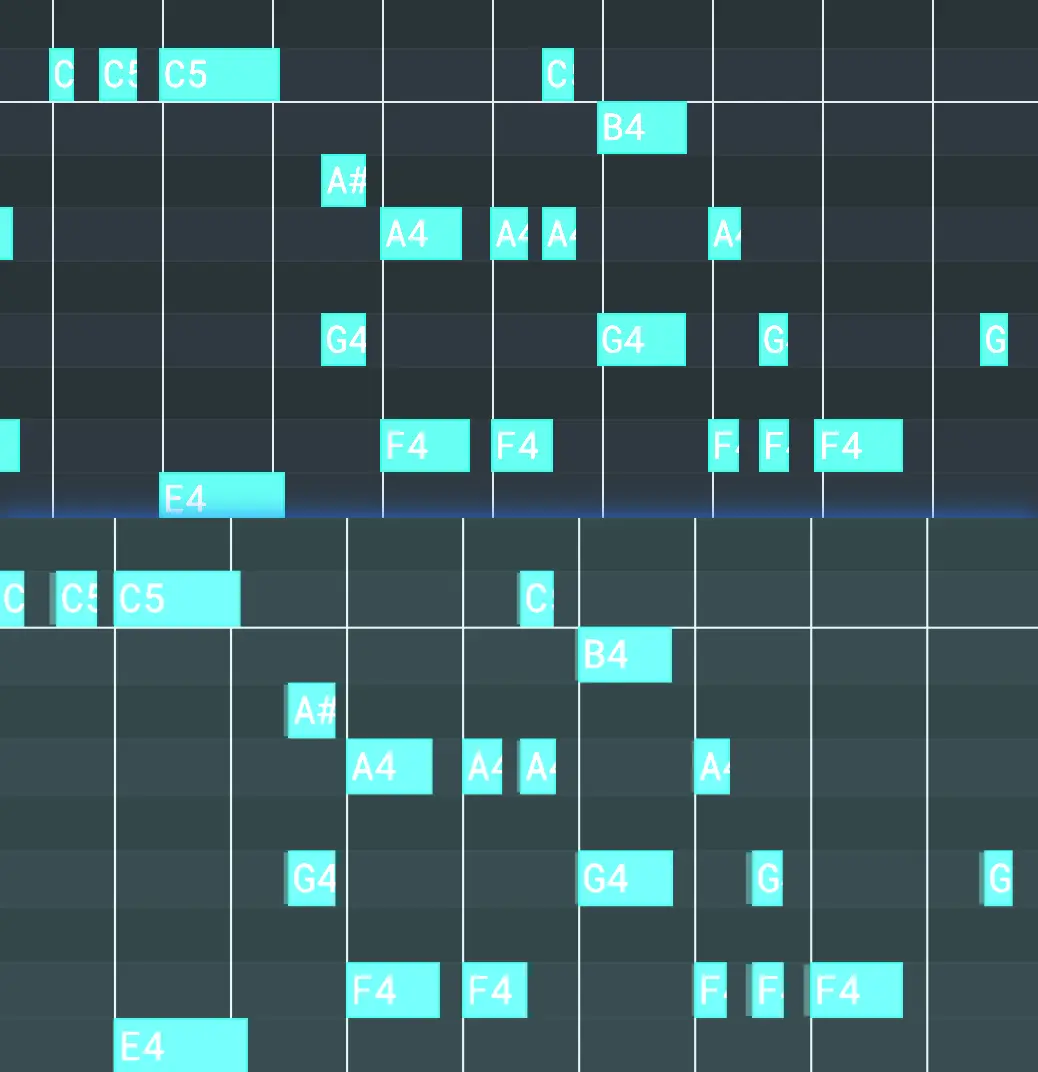
🚀 Pro Tip: The Power of "Strength"
The Strength Slider is what separates amateurs from pros.
- For Drums: Usually, you want 100% Strength for a solid beat.
- For Piano Solos: Try 60-80% Strength. It tightens the rhythm but prevents the music from sounding too stiff or mechanical.
Ready to polish your track?